一 : Fireworks制作红酒酒瓶实例教程
看上去精致漂亮的葡萄酒瓶,其实制作起来非常简单,用fireworks只需几步,就能轻松打造。
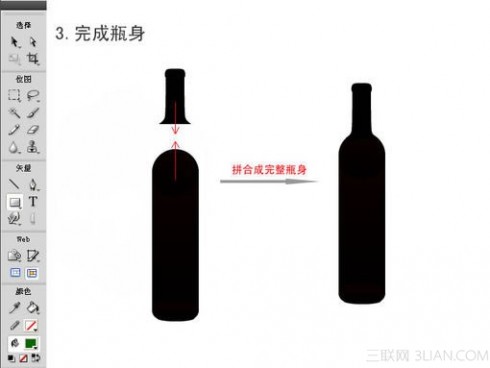
首先,用形状工具画出相应的形状,通过这些形状的组合,我们能够得到一个瓶身。

接着,我们开始制作瓶颈,用钢笔工具勾画出半个瓶颈的形状,通过复制-水平翻转,得到右边半个,这样制作的瓶颈看起来对称平整,比完整勾勒的更好。用路径面板中的组合路径拼合他们。

把制作完成的瓶身和瓶颈组合起来,得到完整的葡萄酒瓶子,这里由于在做包装纸的时候我需要用瓶颈部门形状,所以暂时不需要把他们合并路径。
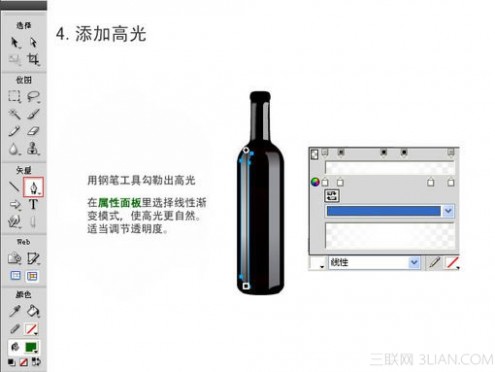
添加高光是很关键的一部,因为有了光影变化,才会有立体感,使用渐变填充,调整透明度,使高光看起来更自然,更符合现实情况,如果平时注意观察,就可以做的更好。
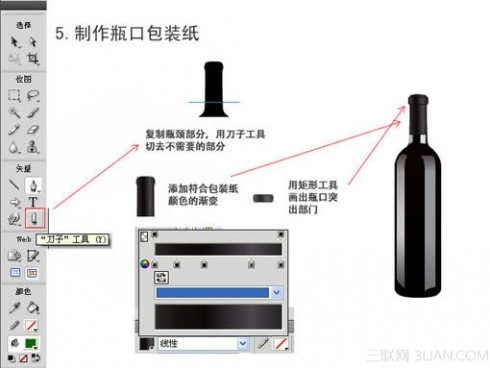
复制瓶颈形状,切去不需要的部分,我们得到瓶颈包装纸的形状,是不是很方便。
把制作完成的瓶身和瓶颈组合起来,得到完整的葡萄酒瓶子,这里由于在做包装纸的时候我需要用瓶颈部门形状,所以暂时不需要把他们合并路径。
添加高光是很关键的一部,因为有了光影变化,才会有立体感,使用渐变填充,调整透明度,使高光看起来更自然,更符合现实情况,如果平时注意观察,就可以做的更好。
复制瓶颈形状,切去不需要的部分,我们得到瓶颈包装纸的形状,是不是很方便。
二 : 40个Fireworks学习英文教程
下面为大家汇总了40个Fireworks学习英文教程,英文名字:40+ High Quality Adobe Fireworks Tutorials, Resources & PNG files。学了这40个教程,会使你的fireworks水平,大有进步的。
友情提示:可以直接单击图片或者文字链接观看教程。也可以直接下载PNG格式源文件。
Adobe Fireworks is getting popular than ever, many web designers find a lot of fun to experiment different techniques and learn how to work with various aspects of Adobe Fireworks to spice up boring pictures and make them into works of arts. So, if you’re interested in learning some new skills, whether you’re a beginner, intermediate or advanced user, these Adobe Fireworks tutorials are for you.
So in today’s post, you’ll find an assortment of top-notch tutorials, resources and .PNG downloadable files that others have freely contributed to the design community for making your next adobe fireworks effect.
1. Add Radial Gradient in Text

Download .PNG file is available
A tutorial which will give you step-by-step instructions to create a peeling effect. Great for placing in a corner of a website to reveal news or offers.
2. Add Radial Gradient in Text

Awesome Light Effects in Fireworks inspired by the James White’s O series
A tutorial which will give you step-by-step instructions to create a peeling effect. Great for placing in a corner of a website to reveal news or offers.
3.
Abstrakter Effekt in Fireworks
This tutorial will reproduce James White’s style using Fireworks. The process is simple, just playing with some circles, blend modes and a bit of color!
4.

Download .PNG file is available
This tutorial will teach you how to create an abstract effect in adobe fireworks.
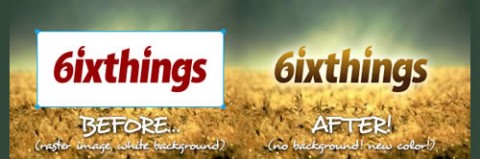
5. Extracting Logos
Download .PNG file is available
This tutorial will show you how to extract a logo and/or logotype from a raster image, using only Adobe Fireworks Live Filters. With this method, you also have the option to re-color the lifted logo in anyway you want: solid, gradient, or textured. All of this, while avoiding the temptations of the quick-and-dirty Wand Tool.
6. Circular Shadows & Highlights

Download .PNG file is available
Gradients and masks are all it takes to create lighting effects for circular shapes in Adobe Fireworks. Generate as many layers of shadows and highlights as you need. This tutorial will start by putting into a canvas a circular graphic to add shadows and highlights to.
7. Simple Orbs Tutorial

Download .PNG file is available
The Simple Orbs Tutorial is a very simple technique , yet it could add some dramatic touches to your design. It is just one layer object but you can replicate it over and over, and change the sizes.
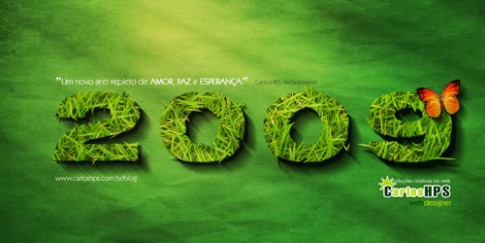
8. Papel de Parede 2009
Download .PNG file is available
Learn how to create a grass text effect in adobe fireworks.
9. Create a vector in Adobe Fireworks
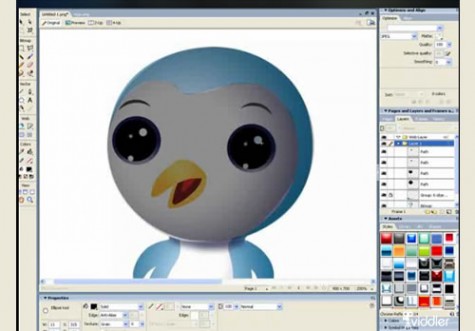
How to make Animations and Animated Graphics in Adobe Fireworks
This is a video tutorial that will teach you how to create a vector graphic in Adobe fireworks.
10.

11. Text effect download

Download .PNG file is available
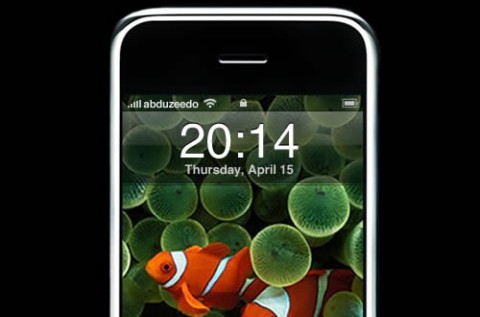
12. Creating the iPhone Interface on Fireworks
Download .PNG file is available
Learn how to create the iphone interface on Fireworks.
13. Fireworks 101

Creating the IE7 logo effect in Fireworks
This tutorial will cover some basic functionalities and it’s very useful for those willing to improve their Fireworks skills. You will learn how to play with paths, combining, subtracting and much more. Also you will end up creating a logo.
14.

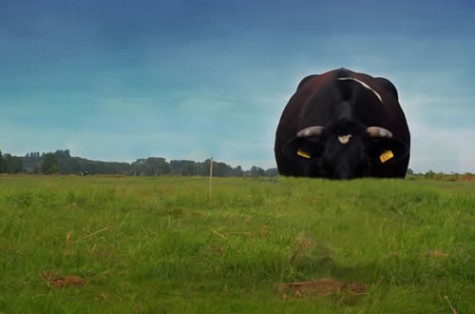
Remove Foreground Object in Fireworks/Photoshop
Learn how to recreate the IE7 logo in Fireworks.
15.
Adobe Fireworks: Text to path
Learn how remove a foreground object from a picture and keep the background with amendments to make it appear as though the object was never there to begin with.
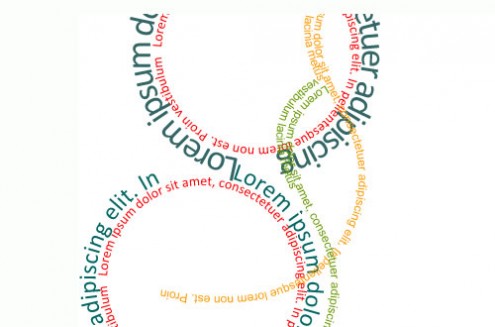
16.
Beautiful night scene
Sometimes we want to align or place our text freely, without having to limit our self to vertical and horizontal view only. Maybe we want to create some so called typography art - which requires us to place text in, let say, a circle, or any free form shapes, created using pen tools. With Adobe Fireworks, you can easily attach texts onto any shape or path created using pen tools.
17.

Creating Fading Light Vectors in Fireworks
You don’t have to be Van Gogh to create a beautiful night scene. Fireworks artist Angelo Sabal will show you how you can easily create a realistic night sky using Fireworks.
18.

Pixelate Effect Tutorial
In this tutorial, you’ll learn how to create some cool effects with fading light linear vectors in Fireworks. It’s really easy to do and takes just a few minutes. Create fading lights using vectors, then convert these vectors into bitmaps, and learn to use effects from Fireworks CS3.
19.
Awesome Floral Type in Fireworks and Photoshop in 5 minutes
Have you ever wanted to create a pixelize look on your designs but you didn’t know how? Well here is your answer ! In this tutorial you will learn how to install 3rd party plugins in adobe fireworks and use them.
20.
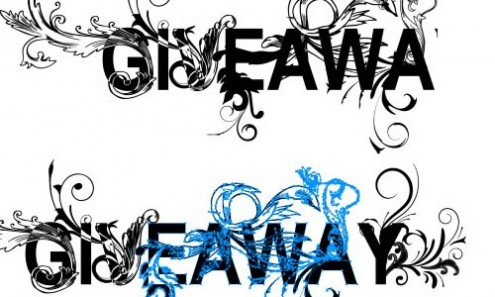
Download .PSD file is available, you can open in fireworks as well
21. Creating A Thick Text Outline
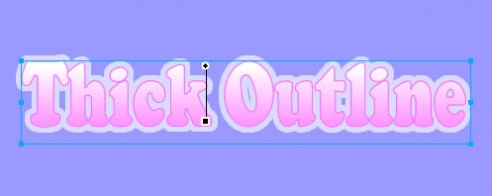
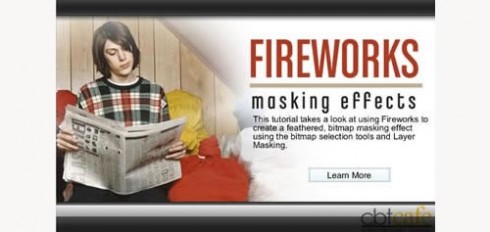
Masking Effects Using Bitmap Masking
22.
waterDrop
Learn to use layer masks (Group as Mask) in Fireworks CS3 to create faded image silhouettes.
23.

Download .PNG file is available
24. Sticky Notes

Download .PNG file is available
Sticky notes are little pieces of bright-colored paper with an adhesive strip on the back, allowing you to jot down reminders, checklists, or *gasp* passwords and post them onto a surface. This Adobe® Fireworks tutorial will show you how to recreate them digitally, with a certain degree of realism, for your own design projects.
25. Create Vista-like Wallpapers with Fireworks

Download .PNG file is available
26. Fireworks 101
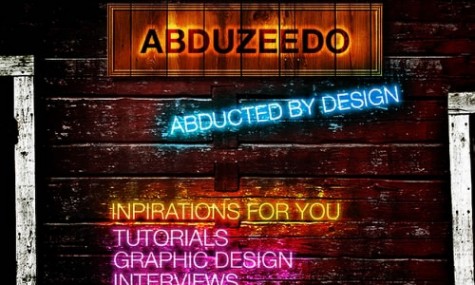
Amazing Neon Lights on Fireworks
This tutorial will go through some of the features that help with fast prototyping, like the fit canvas button and the optimizing panel.
27.
Download zip file
This tutorial will go through a few steps to create neon effects on Fireworks.
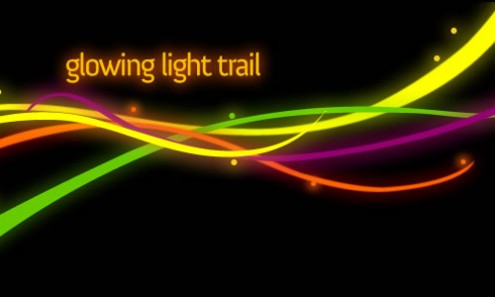
28. Glowing light trail
Download zip file
This tutorial will teach you how to create a colourful glowing light trail. This is rather a simple tutorial that can be performed in only 6 basic steps.
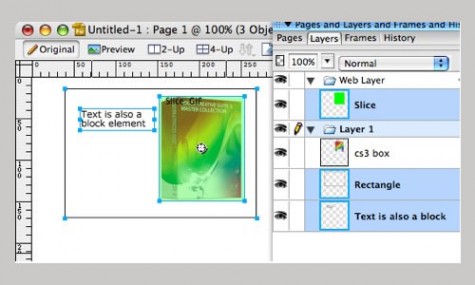
29. Exporting CSS and images in Fireworks CS4
Create Windows vista buttons
Wouldn’t it be nice to simply draw a website design in Fireworks and then instantly export the HTML, CSS code, and all associated files required to display the page, so that all the files are ready to upload to your web server. This article describes the new “CSS and Images” export option available in Fireworks CS4 and gives tips for getting the best results out of it.
30.

31. Create a Slideshow in Adobe Fireworks CS4

Click here to view the finished gallery
This tutorial will teach you how to create a beautiful slideshow gallery with transition effects, categories, captions and resizable images in Fireworks CS4.
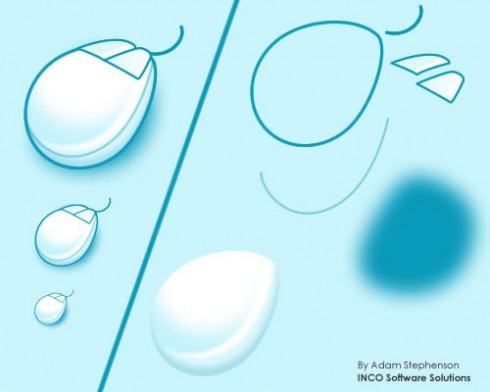
32. How to Change the Colour of an Image Object in Adobe Fireworks

An example of how to create a computer mouse
Quite often, when searching for a relevant image to go on a new website we are designing, we’ll find one that’s almost right, but not quite! Read on to find out how simple it is to change the colour of a selected part of an image in Adobe Fireworks.
33.
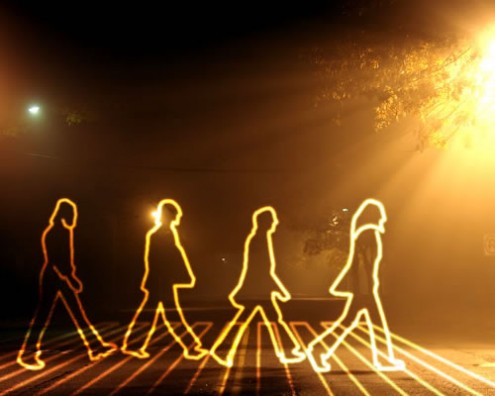
Light Painting in Fireworks
34.
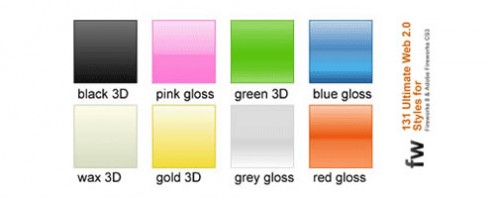
131 Web 2.0 Layer Styles for Fireworks
How to create Light Painting in Fireworks.
Worth Checking Resources
75 Powerful Adobe Fireworks Extensions
This set is based on Ultimate Web 2.0 Layer Styles for Photoshop and is re-done for Fireworks.

Fireworks Developer Center
Here are some of the best 75 Adobe Fireworks Extensions (MXP), nearly all are compatabile with Fireworks MX, 8 and CS3 (and quite a few with Fireworks 3 and 4).

List of Fireworks compatible plug ins
- The Things You Might Have Missed
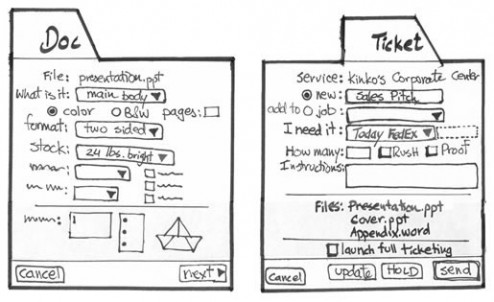
- Rapid prototyping in Fireworks CS3
教程结束,以上就是40个Fireworks学习英文教程,希望对大家有所帮助,谢谢大家阅读!
三 : Fireworks教程-Lost RGB(图文)
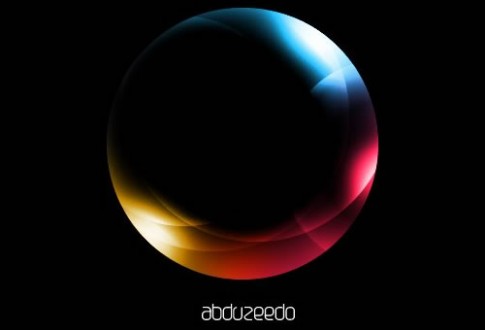
起源:很喜欢winamp的AVS播放器,动态函数写出来的效果很好。如果可以用Firework模拟这种效果会如何呢?(请不要以为我最后模拟了这种效果,呵呵)
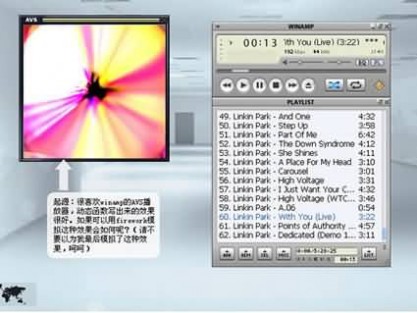
如果用这种图案做个桌面就好了。
新建一个1024*768的png,画布颜色选纯黑色。然后就试试怎样做了(其实我也不知道下一步做什么,跟着感觉走吧)
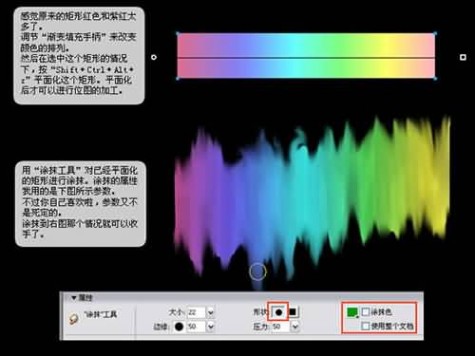
用“矩形工具”画一个大概400*70的矩形,下方的属性就用“渐变—线性—彩色蜡笔”填充。然后就画好一个好看的矩形了。不过它太呆板了,要整一下它。

感觉原来的矩形红色和紫红太多了。
调节“渐变填充手柄”来改变颜色的排列。
然后在选中这个矩形的情况下,按“shift+Ctrl+Alt+z”平面化这个矩形。平面化后才可以进行位图的加工。
用“涂抹工具”对已经平面化的矩形进行涂抹。涂抹的属性我用的是下图所示参数。
不过你自己喜欢啦,参数又不是死定的。
涂抹到右图那个情况就可以收手了。
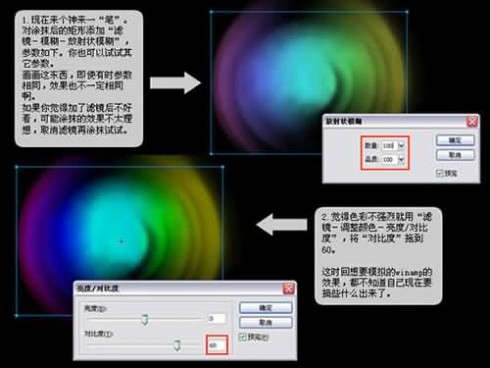
现在来个神来一“笔”。对涂抹后的矩形添加“滤镜—模糊—放射状模糊”,参数如下。你也可以试试其它参数。
画画这东西,即使有时参数相同,效果也不一定相同啊。
如果你觉得加了滤镜后不好看,可能涂抹的效果不太理想,取消滤镜再涂抹试试。
觉得颜色不强烈就用“滤镜—调整颜色—亮度/对比度”,将“对比度”拖到60。
这时回想要模拟的winamp的效果,都不知道自己现在要搞些什么出来了。
先将刚才弄出来的东东选中按F8转换为“位图元件”,改个有意义的名字“Bright”,以便重复使用。
将“Bright”元件从库里拉到画布上,觉得不怎么明亮。
我就在画布上选中“Bright”实例,“Ctrl+Shift+D”克隆一个,克隆后的实例在属性栏的混合模式中选“叠加”,就发觉光亮好多了。
现在的图案底部无力,没有什么安全感。再在库里拉一个“Bright”实例出来,顺时针转90度,和原来两个实例重叠起来,就好像一个光盘了,不过效果太呆而已。
不过我不想做光盘,就先将刚才转过90度的实例的“透明度”改为25%,如果你的显示器够亮的话,就发现底部有些感觉了。
将刚才处理过的三个实例都放到同一个层里,层就改名为“light”层。
不过我们可以看到整体的边缘不是太明显,有什么好办法呢?

为了突出边缘,在同一层上用“矢量”的“面圈形”画一个大小和发光物相当的甜甜圈(数学上成为环形),拖动黄色菱形的调节手柄让面圈形的内径变大。
然后在面圈形的属性处,对面圈形用“渐变—放射状”填充,我用的参数如右图。(羽化是为了让面圈形边缘不要那么明显),自己拖动一下渐变手柄,看看怎样效果才好看。
试了一下,将面圈形放到“light”层的最底部,发光的效果更好。
现在,新建一个叫“text”的层,锁定原来叫“light”的层。
在“text”层里打些字来装饰一下,注意以下的一些参数:字体颜色:白色。混合模式:叠加。消除锯齿:强烈消除锯齿。OK。

不过,发觉字体不太明显。选中刚才打进去的所有文本,然后按“Ctrl+Shift+D”,克隆一组,就发现清晰了许多哦。(右图的Green就是克隆前的效果,很逊。)记不记得这个方法就是刚才在提高彩色的圆的效果时用过,就是克隆一个,混合模式用“叠加”。
在圆的下方打些座右铭也好,废话也好,点缀一下。现在要考虑一下怎样修饰这对废话了。你可以给它加个“滤镜—发光”。
不过字体小的话,加发光滤镜就不好看了。这里有一种方法,就是克隆一个,加“滤镜—模糊—高斯模糊”。不过我两种方法都没用,要挑战一些自己没试过的方法。(没事找事干...)

克隆一个刚才打进去的废话,这样就可以了令文本的颜色更白了
在克隆一个刚才打进去的废话,按“Ctrl+Shift+向下箭头”放在最底一层,然后在“文本描边”里按“笔触选项”,进行如右图的参数调整,就可以看到在原来的文本背后来了一些烂碎纸。
透过毛玻璃看冲凉的恐龙也会觉得是美女。
就选中刚才的描了彩色烂纸的文本,添加“滤镜—高斯模糊”,靓了。
这里受论坛里人家文本描边的手法启发的,这样就做成了一个泛着七彩光芒的文本。
试试其他笔触,说不定有什么惊喜。

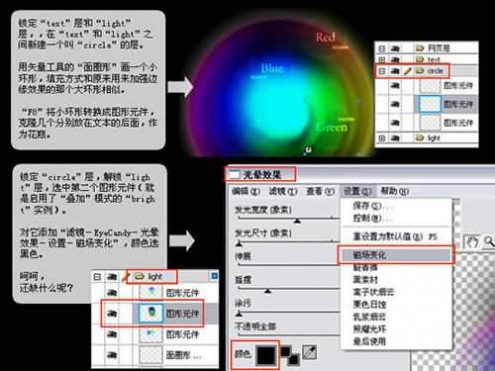
锁定“text”层和“light”层,在“text”和“light”直接新建一个叫“circle”的层。
用矢量工具的“面圈形”画一个小环形,填充方式和原来用来加强边缘效果的那个大环形相似。
“F8”将小环形转换成图形元件,克隆几个分别放在文本的后面,作为花瓶。
锁定“circle”层,解锁“light”层,选中第二个图形元件(就是启用了“叠加”模式的“bright”实例。)
对它添加“滤镜—EyeCandy—光晕效果—设置—磁场变化”,颜色选黑色。
呵呵
还缺什么呢?
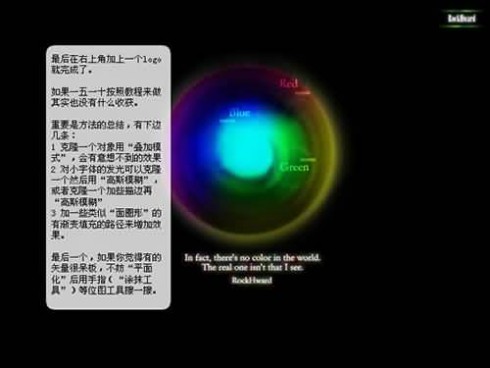
最后在右上角加上一个logo就完成了。
如果一五一十按照教程来做其实也没有什么收获。
重要是方法的总结,有下边几条:
1.克隆一个对象用“叠加模式”,会有意想不到的效果。
2.对小字体的发光可以克隆一个然后用“高斯模糊”或者克隆一个加些描边再“高斯模糊”。
3.加一些类似”“面圈形的有渐变填充的路径来增加效果。
最后一个,如果你觉得有的矢量很呆板,不妨“平面化”后用手指(“涂抹工具”)等位图工具擦一擦。
Fireworks教程结束,希望大家喜欢!
四 : 用Fireworks制作IE图标的教程
1、新建画布,选取椭圆工具,按SHIFT绘制一个圆形,再在圆形的内部绘制一个略小的椭圆,使用菜单对齐命令将两者居中对齐。
2、同时选中圆形和椭圆对象,选择菜单“修改|组合路径|打孔”命令,组合得到圆环图形。
3、选取矩形工具,在圆环中心位置绘制一个矩形框,同时选中两个对象,选择菜单“修改|组合路径|联合”命令。
4、使用钢笔工具,绘制如图所示的图形,用其对原图形进行打孔切割,得到字母“e”的基本形态。
5、绘制一个椭圆,选取缩放工具,将其旋转约45度。
6、选择菜单“修改|改变路径|扩展笔触”,在弹出的“展开笔触”设置框中,设置扩展宽度为“7”。
7、绘制如图所示大小的一个圆形,按SHIFT选中椭圆图形,选择“修改|组合路径|打孔”命令,将椭圆环切去一部分。


13、应用“内侧发光”效果,光晕颜色为“#66CCFF”,再应用“投影”效果。参数设置如图所示。


 本文标题:fireworks教程-Fireworks制作红酒酒瓶实例教程
 61阅读| 精彩专题| 最新文章| 热门文章| 苏ICP备13036349号-1