一 : js实现幻灯片效果
61阅读/ www.61k.net
在网站中使用幻灯片效果的目前很普遍,如何实现,自己经过一番研究,本以为很复杂,想不到却很简单。有现成的jquery插件jquery.KinSlideshow.js。
使用jquery.KinSlideshow.js就可以很轻松的实现幻灯片效果
htm代码:
[html]
<div id="focusNews" >
<a href="test.aspx" target="_blank"><img src="images/1.jpg" alt="标题一" /></a>
<a href="test.aspx" target="_blank"><img src="images/2.jpg" alt="标题二" /></a>
<a href="test.aspx" target="_blank"><img src="images/3.jpg" alt="标题三" /></a>
<a href="test.aspx" target="_blank"><img src="images/4.jpg" alt="标题四" /></a>
<a href="test.aspx" target="_blank"><img src="images/5.jpg" alt="标题五" /></a>
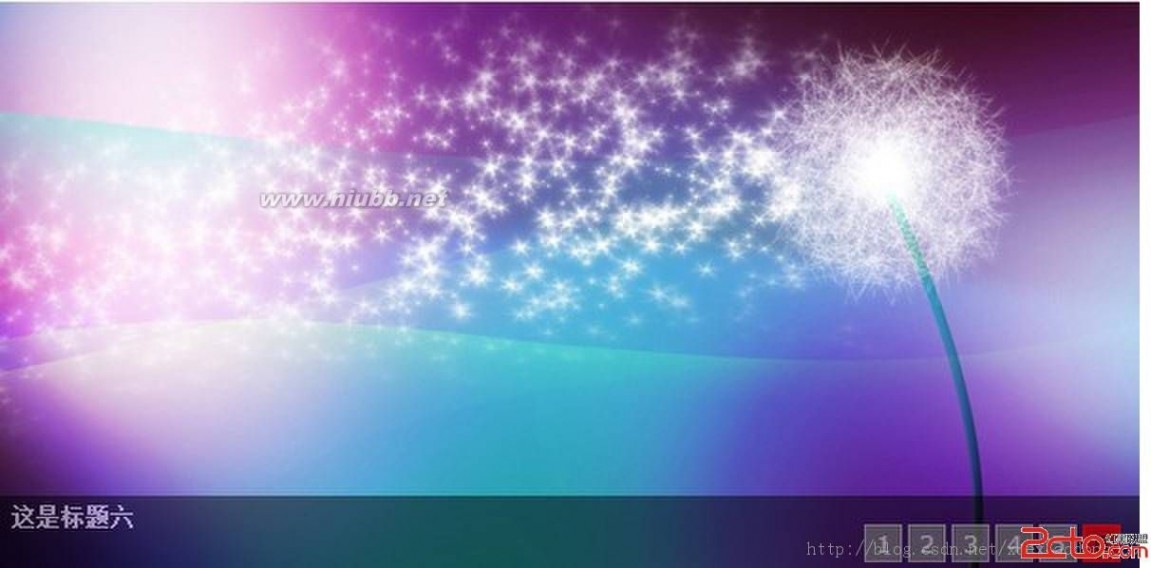
<a href="test.aspx" target="_blank"><img src="images/6.jpg" alt="标题六" /></a>
</div>
js代码:
[javascript]
$(function () {
$("#focusNews").KinSlideshow({
// moveStyle:"down", //设置切换方向为向下 [默认向左切换]
intervalTime:8, //设置间隔时间为8秒 [默认为5秒]
mouseEvent:"mouseover", //设置鼠标事件为“鼠标滑过切换” [默认鼠标点击时切换]
titleFont:{TitleFont_size:14,TitleFont_color:"#FF0000"} //设置标题文字大小为14px,颜色:#FF0000
});
})
设置图片大小的CSS
[css]
.ifocus{width:400px;height:300px;visibility:hidden;}
.ifocus img{width:700px;height:400px; }
最终效果图
二 : JS图片灯箱(lightBox)效果基本原理和demo
到年底了,项目不怎么忙,所以有空特地研究了下KISSY中源码JS灯箱效果,感觉代码比较简单,所以就按照他们的思路依赖于Jquery框架也封装了一个,特地分享给大家,以前经常看到网上很多这样的插件,感觉很多人很牛逼的样子,这样的效果也能做出来,碰巧今天自己也能研究出来一个,代码也不多,就300多行代码,嘿嘿!如果写的不够好,或者还不够的,希望大家多多指教!或者多多发表意见,那些需要值得改进的地方!共同学习!
基本原理
点击缩略图浮层显示大图,可点击键盘←、→键切换图片,也可以鼠标点击左右箭头切换。按下键盘Esc键和点击关闭按钮效果一致。
配置项如下:
container
'#container', container 容器标识,父级盒子ID
targetCls'.J_lightbox', targetCls 元素选择器,需要弹出的图片链接dom节点
layer'#lightbox', 浮层模版选择器
closebtn'.closebtn', 关闭浮层的X按钮
prev'.prevbtn', 上一张触发器
next'.nextbtn', 下一张触发器
easing'linear' jquery 动画函数 默认为 'linear' 或者 'swing' 或者jquery自带的动画效果
JSFiddle效果如下
想要查看效果,请轻轻的点击我,我怕疼,嘿嘿!!
代码中需要了解的知识点如下:
1. getBoundingClientRect()方法:该方法获得页面中某个元素的左,上,右和下分别相对浏览器视窗的位置,他返回的是一个对象,即Object,该对象有是个属 性:top,left,right,bottom;这里的top、left和css中的理解很相似,但是right,bottom和css中的理解有点不 一样,看示意图:
以前getBoundingClientRect()是IE特有的,目前FF3+,opera9.5+,safari 4,都已经支持这个方法。所以兼容性都支持的。
2. 判断图片是否加载完成时 标准浏览器用onload触发,IE用私有属性onreadystatechange触发,需要了解更深入的话 可以阅读这篇文章:想看我,先点击我!ok!
代码简单的分析下:
1.页面初始化时候 调用init方法,执行点击_click()函数。如下代码:
复制代码
init: function(options) {
this.config = $.extend(this.config, options || {});
var self = this,
_config = self.config;
// 点击
self._click();
},
复制代码
2. 点击_click()函数做了如下事情:
1. 点击缩略图:调用 self._showLoadMask(); // 显示loading加载效果 就是页面未加载或者网速慢的时候 显示加载转圈那种效果。
2. self._onLoad($(this).attr('href'),this); // 执行此方法加载大图片。
3. 鼠标mouerover事件和mouseout事件触发 如下代码:
复制代码
// 鼠标mouseover事件(移到动画层)
$(_config.layer).mouseover(function(){
if(_cache.currentImg != 0) {
$(_config.prev).css('display','block');
}
if(_cache.currentImg != ($(_config.targetCls).length - 1)) {
$(_config.next).css('display','block');
}
});
复制代码
// 鼠标移出 隐藏上一页按钮 下一页按钮
$(_config.layer).mouseout(function(){
$(_config.prev).css('display','none');
$(_config.next).css('display','none');
});
4. 点击上一页按钮 或 下一页按钮 图片切换做相应的操作:如下代码:
复制代码
// 点击上一页按钮
$(_config.prev).unbind('click').bind('click',function(){
_cache.currentImg -= 1;
self._onLoad($($(_config.targetCls)[_cache.currentImg]).attr('href'),$(_config.targetCls)[_cache.currentImg]);
if(_cache.currentImg == 0) {
$(_config.prev).css('display','none');
}else {
$(_config.prev).css('display','block');
}
$(_config.next).css('display','block');
});
复制代码
复制代码
// 点击下一页按钮
$(_config.next).unbind('click').bind('click',function(){
_cache.currentImg += 1;
self._onLoad($($(_config.targetCls)[_cache.currentImg]).attr('href'),$(_config.targetCls)[_cache.currentImg]);
if(_cache.currentImg == ($(_config.targetCls).length - 1)) {
$(_config.next).css('display','none');
}else {
$(_config.next).css('display','block');
}
$(_config.prev).css('display','block');
});
复制代码
5. 点击关闭按钮触发关闭事件,代码如下:
复制代码
$(_config.closebtn).unbind('click').bind('click',function(){
var position = self._getPos($(_config.targetCls)[_cache.currentImg]),
width = $($(_config.targetCls)[_cache.currentImg]).width(),
height = $($(_config.targetCls)[_cache.currentImg]).height();
$('img',_config.layer).attr('src','http://m2.img.papaapp.com/farm5/d/2014/0126/14/E6520E9D47F0FE8AB04B93BE922C6707_ORIG_1_1.gif');
$(_config.layer).animate({
'left' : position.x,
扩展:lightbox demo / 灭蚊蝇灯箱制作的原理 / 超薄灯箱原理
'top' : position.y,
'width' : width,
'height' : height,
"borderWidth": 0
},0.2,_config.easing,function(){
$(_config.layer).css('display','none');
_cache.isShow = false;
});
});
复制代码
6.键盘左右键除法事件代码如下:
复制代码
/*
* 键盘左右键触发 Esc键码27 键盘右移键39 左移键 37
*/ $(document).unbind('keydown').bind('keydown',function(e){
var keyCode = e.keyCode;
if(_cache.isShow) {
if(keyCode == 27) {
$(_config.closebtn).click();
}else if(keyCode == 37) {
if(_cache.currentImg == 0) {
return;
} $("#maskLayer").css('display','block');
$(_config.prev).click();
}else if(keyCode == 39) {
if(_cache.currentImg == ($(_config.targetCls).length - 1)) {
return;
}
$("#maskLayer").css('display','block');
$(_config.next).click();
}
}
});
复制代码
7. 窗口缩放事件 代码如下:
复制代码
// 窗口缩放事件
$(window).resize(function(){
if(_cache.isShow){
if(self.isrun && $(self.isrun).is(":animated")) {
$(self.isrun).stop();
}
self._onLoad($($(_config.targetCls)[_cache.currentImg]).attr('href'),$(_config.targetCls)[_cache.currentImg]);
}
});
复制代码
3. 下面还有几个方法不一一解析了 有兴趣的童鞋可以看看代码,下面会提供demo下载或在看看上面Jsfiddle链接效果或者源码:分别是:
_showLoadMask().显示loading加载效果
_onLoad() 加载大图片
_getCenter() 层居中对齐
下面是所有的JS代码如下:**
* JS灯箱效果
* @time 2014-1-24
* @author tugenhua
*/
function LightBox(options) {
/**
* 参数说明
* @container 容器标识,父级盒子ID
* @targetCls 元素选择器,需要弹出的图片链接dom节点
* @layer 浮层模版选择器
* @closebtn 关闭浮层的X按钮
* @prev 上一张触发器
* @next 下一张触发器
* @easing jquery 动画函数 默认为 'linear' 或者 'swing' 或者jquery自带的动画效果
*/
this.config = {
container : '#container',
targetCls : '.J_lightbox',
layer : '#lightbox',
closebtn : '.closebtn',
prev : '.prevbtn',
next : '.nextbtn',
easing : 'linear'
};
this.cache = {
isShow : false,
currentImg : null
};
// 初始化
this.init(options);
}
LightBox.prototype = {
constructor: LightBox,
init: function(options) {
this.config = $.extend(this.config, options || {});
var self = this,
_config = self.config;
// 点击
self._click();
},
/*
* 获取元素的位置
* @method _getPos()
* @param node 元素的节点
* {private}
*/
_getPos: function(node) {
var pos = {},
xy = $(node)[0].getBoundingClientRect(),
sl = $(window).scrollLeft(),
st = $(window).scrollTop();
pos.x = xy.left + sl;
pos.y = xy.top + st;
return pos;
},
/*
* 点击页面上图片
* @method _click();
* {private}
*/
_click: function() {
var self = this,
_config = self.config,
_cache = self.cache;
$(_config.targetCls,_config.container).each(function(index,item) {
$(item).unbind('click');
$(item).bind('click',function(e){
e.preventDefault();
_cache.currentImg = $(_config.targetCls).index($(this));
// 显示loading加载效果
self._showLoadMask();
// 加载内容
self._onLoad($(this).attr('href'),this);
});
// 鼠标mouseover事件(移到动画层)
$(_config.layer).mouseover(function(){
if(_cache.currentImg != 0) {
$(_config.prev).css('display','block');
}
if(_cache.currentImg != ($(_config.targetCls).length - 1)) {
$(_config.next).css('display','block');
}
});
// 鼠标移出 隐藏上一页按钮 下一页按钮
$(_config.layer).mouseout(function(){
$(_config.prev).css('display','none');
$(_config.next).css('display','none');
});
// 点击上一页按钮
$(_config.prev).unbind('click').bind('click',function(){
_cache.currentImg -= 1;
self._onLoad($($(_config.targetCls)[_cache.currentImg]).attr('href'),$(_config.targetCls)[_cache.currentImg]);
扩展:lightbox demo / 灭蚊蝇灯箱制作的原理 / 超薄灯箱原理
if(_cache.currentImg == 0) {
$(_config.prev).css('display','none');
}else {
$(_config.prev).css('display','block');
}
$(_config.next).css('display','block');
});
// 点击下一页按钮
$(_config.next).unbind('click').bind('click',function(){
_cache.currentImg += 1;
self._onLoad($($(_config.targetCls)[_cache.currentImg]).attr('href'),$(_config.targetCls)[_cache.currentImg]);
if(_cache.currentImg == ($(_config.targetCls).length - 1)) {
$(_config.next).css('display','none');
}else {
$(_config.next).css('display','block');
}
$(_config.prev).css('display','block');
});
// 点击关闭按钮X 隐藏lightBox图片
$(_config.closebtn).unbind('click').bind('click',function(){
var position = self._getPos($(_config.targetCls)[_cache.currentImg]),
width = $($(_config.targetCls)[_cache.currentImg]).width(),
height = $($(_config.targetCls)[_cache.currentImg]).height();
$('img',_config.layer).attr('src','http://m2.img.papaapp.com/farm5/d/2014/0126/14/E6520E9D47F0FE8AB04B93BE922C6707_ORIG_1_1.gif');
$(_config.layer).animate({
'left' : position.x,
'top' : position.y,
'width' : width,
'height' : height,
"borderWidth": 0
},0.2,_config.easing,function(){
$(_config.layer).css('display','none');
_cache.isShow = false;
});
});
/*
* 键盘左右键触发 Esc键码27 键盘右移键39 左移键 37
*/
$(document).unbind('keydown').bind('keydown',function(e){
var keyCode = e.keyCode;
if(_cache.isShow) {
if(keyCode == 27) {
$(_config.closebtn).click();
}else if(keyCode == 37) {
if(_cache.currentImg == 0) {
return;
}
$("#maskLayer").css('display','block');
$(_config.prev).click();
}else if(keyCode == 39) {
if(_cache.currentImg == ($(_config.targetCls).length - 1)) {
return;
}
$("#maskLayer").css('display','block');
$(_config.next).click();
}
}
});
// 窗口缩放事件
$(window).resize(function(){
if(_cache.isShow){
if(self.isrun && $(self.isrun).is(":animated")) {
$(self.isrun).stop();
}
self._onLoad($($(_config.targetCls)[_cache.currentImg]).attr('href'),$(_config.targetCls)[_cache.currentImg]);
}
});
});
},
/*
* 显示loading加载效果
* @method _showLoadMask()
* {private}
*/
_showLoadMask: function(){
var self = this,
_config = self.config,
_cache = self.cache;
var maskLayer = $('#maskLayer'),
left,
top;
// 有的话 不需要创建 否则的话 创建load图标层
if(maskLayer.length > 0) {
left = ($(window).width() - $(maskLayer).width()) / 2 + $(window).scrollLeft(),
top = ($(window).height() - $(maskLayer).height()) / 2 + $(window).scrollTop();
$(maskLayer).css({'left':left + 'px','top':top + 'px','display':'block'});
}else {
var mask = $("<div id='maskLayer' class='maskLayer'></div>");
// 加载loading图标
$(mask).html("<img src=http://www.2cto.com/uploadfile/2014/0128/20140128082316981.com/&'>");
$('body').append(mask);
maskLayer = $('#maskLayer');
left = ($(window).width() - $(maskLayer).width()) / 2 + $(window).scrollLeft(),
top = ($(window).height() - $(maskLayer).height()) / 2 + $(window).scrollTop();
$(maskLayer).css({'left':left + 'px','top':top + 'px','display':'block'});
}
},
/*
* 加载大图片
* @method _onLoad()
* @param {href,this} 当前的大图片的src 当前点击图片元素节点
*/
_onLoad: function(src,$this){
var self = this,
_config = self.config,
_cache = self.cache;
// 创建img
var img = new Image(),
isIE = navigator.userAgent.match(/MSIE/)!= null;
if(!isIE) {
img.onload = function() {
if(img.complete == true) {
// 图片定位居中
self._getCenter(img,$this);
}
}
}else {
/*
* ie6,7,8
* readyState:complete 动态创建的 IMG 标记可以触发 onreadystatechange 事件
扩展:lightbox demo / 灭蚊蝇灯箱制作的原理 / 超薄灯箱原理
*/
img.onreadystatechange = function() {
if(img.readyState == 'loaded' || img.readyState == 'complete') {
// 图片定位居中
self._getCenter(img,$this);
}
}
}
img.src = src;
},
/*
* 层居中对齐
* @method _getCenter();
* @param {img,$this} 动态创建img 当前点击图片元素节点
*/
_getCenter: function(img,$this) {
var self = this,
_config = self.config,
_cache = self.cache;
// 先隐藏load图标
$("#maskLayer") && $("#maskLayer").css('display','none');
var img_w = img.width,
img_h = img.height,
win_w = $(window).width(),
win_h = $(window).height(),
left = $(window).scrollLeft(),
top = $(window).scrollTop();
img_w = (img_w > win_w - 20) ? win_w - 20 : img_w;
var layer_left = (win_w - img_w)/2 + left,
layer_top = (win_h - img_h)/2 + top;
var position = self._getPos($this),
layer_width = $($this).width(),
layer_height = $($this).height();
var layer_img = $('img',_config.layer);
$(layer_img).attr('src','http://m2.img.papaapp.com/farm5/d/2014/0126/14/E6520E9D47F0FE8AB04B93BE922C6707_ORIG_1_1.gif');
$(layer_img).css({'width':img_w,'height':img_h});
$(layer_img).fadeOut(0.3);
layer_left = layer_left < 0 ? 0 : layer_left;
layer_top = layer_top < 0 ? 0 : layer_top;
if(!_cache.isShow) {
$(_config.layer).css({
'width' : layer_width,
'height' : layer_height,
'left' : position.x,
'top' : position.y,
'display' : 'block'
});
_cache.isShow = true;
if(self.isrun && $(self.isrun).is(":animated")) {
$(self.isrun).stop();
}
self.isrun = $(_config.layer).animate({
'left' : layer_left,
'top' : layer_top,
'width' : img_w,
'height' : img_h,
"borderWidth": "10px"
}, 0.3,_config.easing,function(){
$(layer_img).attr('src',$(img).attr('src'));
$(layer_img).fadeIn(0.3);
});
}else {
if(self.isrun && $(self.isrun).is(":animated")) {
$(self.isrun).stop();
}
self.isrun = $(_config.layer).animate({
'left' : layer_left,
'top' : layer_top,
'width' : img_w,
'height' : img_h
}, 0.3,_config.easing,function(){
$(layer_img).attr('src',$(img).attr('src'));
$(layer_img).fadeIn(0.3);
});
}
}
};
// 初始化
$(function(){
new LightBox({});
});
扩展:lightbox demo / 灭蚊蝇灯箱制作的原理 / 超薄灯箱原理
三 : js实现选项卡效果
<!DOCTYPEhtmlPUBLIC "-//W3C//DTD XHTML 1.0 Transitional//EN" "http://www.w3.org/TR/xhtml1/DTD/xhtml1-transitional.dtd">
<html xmlns="http://www.w3.org/1999/xhtml">
<head>
<meta http-equiv="Content-Type" content="text/html; charset=utf-8" />
<title>无标题文档</title>
<style>
ul{
list-style-type:none;
margin-left:-40px;
position:relative;
}
ul li{
padding:5px;
float:left;
width:80px;
position:relative;
display:block;
border-top-width: 1px;
border-right-width: 1px;
border-left-width: 1px;
border-top-style: solid;
border-right-style: solid;
border-left-style: solid;
border-bottom-style:none;
margin:0px 2px 0px 0px;;
z-index:2;
}
#L1{
background-color:#9CC;
border-top-color: #F6C;
border-right-color: #F6C;
border-left-color: #F6C;
}
#L2{
background-color:#CC9;
border-color:#309;
margin-left:1px;
}
#L3{
background-color:#FF3;
border-color:#360;
}
#L4{
background-color:#690;
border-color:#360;
}
div{
width:400px;
height:220px;
position:absolute;
margin-top:28px;
z-index:1;
}
#d1{
background-color:#9CC;
border:1px solid #C39;
}
#d2{
background-color:#CC9;
border:1px solid #309;
display:none;
}
#d3{
background-color:#FF3;
border:1px solid #360;
display:none;
}
#d4{
background-color:#690;
border:1px solid #360;
display:none;
}
</style>
<script language="javascript">
//选项卡的个数
var num=4;
function getTab(now){
for(var i=1;i<=num;i++){
if(i==now){
document.getElementById("d"+i).style.display="block";
}else{
document.getElementById("d"+i).style.display="none";
}
}
}
</script>
</head>
<body>
<ul>
<li id="L1" onclick="getTab(1)">手机数码</li>
<li id="L2" onclick="getTab(2)">手机数码</li>
<li id="L3" onclick="getTab(3)">手机数码</li>
<li id="L4" onclick="getTab(4)">手机数码</li>
</ul>
<div id="d1">这里是手机数码</div>
<div id="d2">这里是家用电器</div>
<div id="d3">这里是品牌服饰</div>
<div id="d4">这里是品牌服饰</div>
</body>
</html>
四 : JQuery实现图片轮播效果
【实例演示】


用JQuery操作DOM确实很方便,并且JQuery提供了非常人性化的API应付我们的各种需求,其中选择器在此示例-“JQuery实现图片轮播效果”上体现的尤为出色。[www.61k.com)大大简化了js的代码。
【原理简述】
这里大概说一下整个流程:
1,将除了第一张以外的图片全部隐藏,
2,获取第一张图片的alt信息显示在信息栏,并添加点击事件
3,为4个按钮添加点击侦听,点击相应的按钮,用fadeOut,fadeIn方法显示图片
4,设置setInterval,定时执行切换函数
【代码说明】
filter(":visible") :获取所有可见的元素
unbind():从匹配的元素中删除绑定的事件
siblings:取得一个包含匹配的元素集合中每一个元素的所有唯一同辈元素的元素集合
例:找到每个div的所有同辈元素中带有类名为selected的元素。
<p>Hello</p><div><span>Hello Again</span></div><p>And Again</p>
执行 $("div").siblings(),结果
[ <p>Hello</p>, <p>And Again</p> ]
【程序源码】
HTML部分:
<body>
<div id="banner">
<div id="banner_bg"></div><!--标题背景-->
<div id="banner_info"></div><!--标题-->
<ul>
<li class="on">1</li>
<li>2</li>
<li>3</li>
<li>4</li>
</ul>
<div id="banner_list">
<a href="#" target="_blank"><img src="imgs/p1.jpg" title="橡树小屋的blog" alt="橡树小屋的blog"/></a>
<a href="#" target="_blank"><img src="imgs/p5.jpg" title="橡树小屋的blog" alt="橡树小屋的blog"/></a>
<a href="#" target="_blank"><img src="imgs/p3.jpg" title="橡树小屋的blog" alt="橡树小屋的blog"/></a>
<a href="#" target="_blank"><img src="imgs/p4.jpg" title="橡树小屋的blog" alt="橡树小屋的blog"/></a>
</div>
</div>
</body>
CSS部分:
<style type="text/css">
#banner {position:relative; width:478px; height:286px; border:1px solid #666; overflow:hidden;}
#banner_list img {border:0px;}
#banner_bg {position:absolute; bottom:0;background-color:#000;height:30px;filter: Alpha(Opacity=30);opacity:0.3;z-index:1000;
cursor:pointer; width:478px;}
#banner_info{position:absolute; bottom:0; left:5px;height:22px;color:#fff;z-index:1001;cursor:pointer}
#banner_text {position:absolute;width:120px;z-index:1002; right:3px; bottom:3px;}
#banner ul {position:absolute;list-style-type:none;filter: Alpha(Opacity=80);opacity:0.8; border:1px solid #fff;z-index:1002;
margin:0; padding:0; bottom:3px; right:5px;}
#banner ul li { padding:0px 8px;float:left;display:block;color:#FFF;border:#e5eaff 1px solid;background:#6f4f67;cursor:pointer}
#banner ul li.on { background:#900}
#banner_list a{position:absolute;} <!-- 让四张图片都可以重叠在一起-->
</style>
JS部分:
<script type="text/javascript">
var t = n =0, count;
$(document).ready(function(){
count=$("#banner_list a").length;
$("#banner_list a:not(:first-child)").hide();
$("#banner_info").html($("#banner_list a:first-child").find("img").attr('alt'));
$("#banner_info").click(function(){window.open($("#banner_list a:first-child").attr('href'), "_blank")});
$("#banner li").click(function() {
var i = $(this).text() -1;//获取Li元素内的值,即1,2,3,4
n = i;
if (i >= count) return;
$("#banner_info").html($("#banner_list a").eq(i).find("img").attr('alt'));
$("#banner_info").unbind().click(function(){window.open($("#banner_list a").eq(i).attr('href'), "_blank")})
$("#banner_list a").filter(":visible").fadeOut(500).parent().children().eq(i).fadeIn(1000);
document.getElementById("banner").style.background="";
$(this).toggleClass("on");
$(this).siblings().removeAttr("class");
});
t = setInterval("showAuto()", 4000);
$("#banner").hover(function(){clearInterval(t)}, function(){t = setInterval("showAuto()", 4000);});
})
function showAuto()
{
n = n >=(count -1) ?0 : ++n;
$("#banner li").eq(n).trigger('click');
}
</script>
附件:源码下载
《JQuery实现图片轮播效果》
BY
橡树小屋
from扩展:jquery实现图片轮播 / 用jquery实现图片轮播 / jquery图片轮播效果
万和城
扩展:jquery实现图片轮播 / 用jquery实现图片轮播 / jquery图片轮播效果
五 : 用move.js库实现百叶窗特效
今天操作的是一个,百叶窗效果的一个页面特效,好,现在直接上最终效果吧。demo做的有点low,不过效果都在了

这是html和css代码:思路就是,每一个li里面div,放几个p,通过调节translatY,来控制。
<style> *{ padding: 0; margin: 0; list-style: none; } #bai{ width: 400px; height: auto; float: left; margin-left:20px auto; } li{ text-align: center; width: 100%; height: 50px; line-height: 50px; border-bottom: 1px dashed #000; position: relative; overflow: hidden; } div.box{ width: 100%; height: 50px; position: absolute; top: -50px; } p{ height: 50px; } </style> </head> <body> <ul id="bai"> <li> <div class="box a1"> <p>1111111111111111</p> <p>22222222222222222</p> </div> </li> <li> <div class="box a2"> <p>33333333333333333</p> <p>44444444444444444</p> </div> </li> <li> <div class="box a3"> <p>55555555555555555</p> <p>66666666666666666</p> </div> </li> <li> <div class="box a4"> <p>77777777777777777</p> <p>88888888888888888</p> </div> </li> </ul> 关键在这里:可以来这里下载
<script src="js库/move.min.js"></script>
导入这个,这个插件怎么用呢?具体的我就不讲了,可以看这里 ,这篇文章讲的挺好的。关键就是,move()里面取代的对象,跟jquery $取DOM节点对象一样,下面简单的陈了一些方法
move('.square') .to(500, 200) .rotate(180) .scale(.5) .set('background-color', '#FF0551') .set('border-color', 'black') .duration('3s') .skew(50, -10) .then() .set('opacity', 0) .duration('0.3s') .scale(0.1) .pop() .end(); 接下来,放上接下来全部js代码,整体思路是,两个定时器,一个定时器来定时总的时间,多久后开始,第二次定时器,是每个小div,依次多久执行动画。
<script> window.onload = function(){ var num=1; /*为了取到各个div*/ var timer=null;/*定义定时器*/ var tet = false;/*这里用来判断方向*/ ding(); function ding(){ setInterval(function(){ change(); },3000) } function change(){ timer=setInterval(function(){ if(num == 5){ clearInterval(timer); num=1; tet = !tet; } else if(tet == false){ move("#bai .a"+num+"").y(50).end();/*这里用到就是,move中的translateY方法,简称y()*/ num++; } else{ move("#bai .a"+num+"").y(0).end(); num++; } },100) } } </script> 以上就是本文的全部内容,希望本文的内容对大家的学习或者工作能带来一定的帮助,同时也希望多多支持61阅读!
本文标题:js实现幻灯片效果-js实现幻灯片效果61阅读| 精彩专题| 最新文章| 热门文章| 苏ICP备13036349号-1